How to Prevent Smoothie Separation, Foam, and Browning: Emulsifiers, Timing, and Storage
If your smoothie looks perfect at blend-time but becomes watery and layered, develops a thick foam cap, or turns brown in the fridge, it’s not “bad ingredients.” It’s physics and chemistry doing what they always do when a blend is full of water + tiny particles + air + enzymes. The good news: you can fix all three problems with a few reliable levers - emulsifiers (or natural binders), timing, and storage.

This guide is deliberately practical: what causes separation, foam, and browning—and the specific changes that prevent them without turning your smoothie into a thick paste. If you want the broader foundation for ratios, ingredient order, and timing, start with: How to Make Smoothies in Any Blender.
Why Smoothies Separate: It’s Not One Problem
Separation is what happens when a smoothie is basically a suspension: tiny solids floating in water. Over time, gravity pulls heavier particles down, water moves up, and fat droplets try to clump together. Some recipes resist this naturally (banana + yogurt + oats). Others separate fast (watery fruit + juice + ice).
In real life, separation usually comes from a combination of:
- Low viscosity: too much thin liquid (water/juice) and not enough fiber or body.
- Weak emulsification: fat (nut butter, dairy, seeds) isn’t properly dispersed and starts regrouping.
- Large particle size: chunks of greens, oats, or seeds settle faster.
- Temperature changes: as the blend warms, thickness drops and settling speeds up.
Why Smoothies Foam: You’re Trapping Air on Purpose
Foam is not “random.” Foam is air dispersed into liquid and stabilized by something in the recipe. High-speed blending pulls in air; then certain ingredients keep that air from collapsing quickly.
The biggest foam drivers are:
- High speed + long blending: more air incorporation.
- Protein powders: many are designed to foam (that’s why shakes get “shaker bottle foam”).
- Leafy greens: they trap air mechanically and increase bubbles.
- Very cold blends: cold liquid can hold bubbles longer (especially with stabilizers).
Foam is mostly a cosmetic issue, but it matters for storage: foam increases surface area and oxygen exposure, which accelerates browning.
Why Smoothies Turn Brown: Oxygen + Enzymes + Time
Browning is typically oxidation. Many fruits (and some greens) contain enzymes that darken when exposed to oxygen after cell walls are broken during blending. The more air you blend in, and the more headspace you store with, the faster color shifts.
A green smoothie can go from bright to “olive” quickly; a banana-based smoothie can turn tan; a berry smoothie can dull and darken. This doesn’t always mean it’s unsafe, but it does look and taste less fresh.
The 10-Minute Fix: Make a “Stable Base” First
If you want a smoothie that stays decent for hours (or overnight), the solution is not “blend less.” The solution is to build a base that resists settling, then add the rest. Here’s the simplest structure:
- Start with your liquid + body ingredient: yogurt, kefir, oats, chia, or a small banana portion.
- Add an emulsifier (optional but powerful): lecithin (sunflower/soy) is extremely effective at stabilizing blends.
- Blend briefly until smooth: you’re building thickness and dispersion without whipping in excess air.
- Add remaining ingredients and blend just to finish: enough to fully break down solids, not enough to create a foam cap.
If you already have a separation-prone recipe, don’t change everything. Change one lever: add a small stabilizer and adjust blending time.
Emulsifiers and Natural Stabilizers (What Works in Real Smoothies)
An emulsifier helps fat and water stay mixed. A stabilizer increases viscosity and slows particle settling. You can use either, but the most reliable results come from a combination.
Option A: Lecithin (Most Effective, Small Dose)
Lecithin is the “quiet professional” solution. It helps keep fat droplets dispersed and improves stability in blends that include nut butter, dairy, coconut milk, or seeds. Typical use is a small amount—enough to help the mixture behave, not to change flavor.
Option B: Chia or Ground Flax (Stability + Body)
These absorb water and create a gel-like structure that makes separation slower. They also help a smoothie feel thicker without needing more frozen fruit. If you hate seed texture, use ground flax or blend longer (but not longer than needed).
Option C: Oats (Best “Invisible” Thickener)
A small amount of oats increases body and helps “hold” tiny particles in place. It’s especially useful for smoothies stored for later because it reduces watery top layers.
Option D: Banana, Avocado, or Yogurt (Built-In Stability)
These aren’t emulsifiers, but they create a thick, cohesive base that resists settling. If your smoothie always separates, check if the recipe is missing a true “body” ingredient.
Timing and Technique: How to Reduce Foam Without Losing Smoothness
Most foam issues are user-generated: too fast, too long, too much headspace in the jar. You want enough shear to fully blend ingredients, but not so much that you whip the drink.
- Use the lowest effective speed: start low, ramp up only as needed to finish texture.
- Don’t blend “for safety”: if it’s smooth, stop. Extra time mostly adds heat and air.
- Keep the jar reasonably full: more empty space means more air pulled in and more foam.
- Let it rest 2–3 minutes: foam often collapses on its own. This matters before you cap and store.
If your smoothie routinely turns chunky (which can also worsen separation because particles settle faster), fix circulation first. This is the shortest route to consistently smooth blending: Why Smoothies Turn Chunky (and How to Fix It).
Storage Rules That Actually Prevent Separation and Browning
Storing a smoothie is not the same as storing juice. You’re trying to reduce oxygen contact, slow enzyme activity, and limit settling. The rules below are simple but strict—because these problems are predictable.
Rule 1: Minimize Headspace
Browning accelerates when you store a smoothie with a big air pocket at the top. Fill your container as close to the lid as practical. Less oxygen = slower color change.
Rule 2: Chill Fast and Keep Cold
Warmth speeds enzyme activity and loosens texture (which increases separation). Refrigerate immediately. If you’re meal-prepping for the week, freezer packs can solve the timing issue cleanly: Smoothie Meal Prep (Freezer Packs).
Rule 3: Use Acid When It Fits the Flavor
A small amount of lemon/lime/orange can slow browning in many fruit smoothies and brightens flavor. It’s not magic, but it helps, especially for apple/banana-heavy blends. For greens, citrus is often a clean fit.
Rule 4: Don’t Store a Foam Cap
If you blend to a thick foam layer and immediately cap it, you’ve created an oxygen-rich surface that browns faster and separates faster. Let it rest a couple minutes, tap the container, or pour gently to reduce foam before storing.
Rule 5: Shake Is Not a Sin (But Use It Correctly)
A stored smoothie will rarely look identical to a fresh one. Some settling is normal. A firm shake before drinking is fine. What you want to avoid is storing something that turns into “two distinct phases” within an hour. That’s a recipe structure issue, not a storage issue.
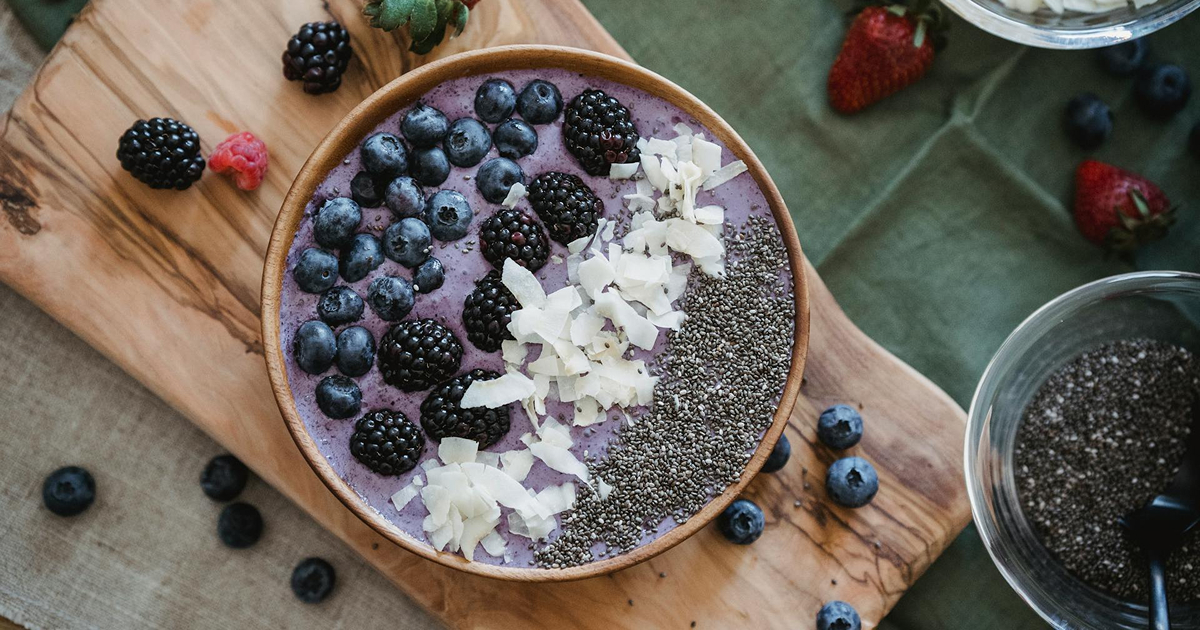
Practical “No-Separation” Recipe Patterns
You don’t need a new recipe. You need a pattern that works with your ingredients. These are stable structures you can reuse:
1) The Creamy Base Pattern (Most Reliable)
- Milk or kefir
- Greek yogurt (or a banana + nut butter combo)
- Berries or mango
- Optional: oats or chia
This pattern resists separation because it starts thick, contains natural emulsifiers, and isn’t mostly water.
2) The Green Smoothie Pattern (Best for Color Control)
- Liquid + yogurt (or avocado) first
- Greens next (blend until fully smooth)
- Fruit last
- Optional: citrus squeeze
Blending greens into a thicker base reduces visible “green flecks” and slows settling. Citrus helps keep the color brighter longer (and makes greens taste cleaner).
3) The Protein Smoothie Pattern (Least Foam)
- Liquid first
- Protein powder next (short blend)
- Then fruit + ice (finish blend, stop early)
Protein powders can foam aggressively. Shorter blending plus a thicker base usually prevents the “foam mountain.”
What Not to Do (Common Mistakes That Guarantee Separation)
- Storing “water + fruit” blends: thin recipes will separate fast, no matter how expensive your blender is.
- Over-diluting to avoid stalls: adding too much liquid to keep blades moving often creates a drink that can’t stay mixed.
- Blending far longer than needed: more air + more heat = worse color and worse stability.
- Using big containers half full: headspace is oxygen, and oxygen speeds browning.
Bottom Line
Separation, foam, and browning are not mysterious—and they’re not solved by “better ingredients.” They’re solved by structure (a stable base), process (blend enough, not forever), and storage (low oxygen, cold temperature, minimal headspace). If you want a smoothie that looks and tastes good later, build thickness first, reduce air, and store it like a product that oxidizes—because it does.
