Smoothie Meal Prep: Freezer Packs, Portioning, and Storage That Preserves Flavor
Freezer smoothie packs promise “grab and blend,” but many people end up with dull flavor, icy texture, and frozen bricks that won’t circulate. Meal prep works when you treat it like a system: portioning that blends predictably, storage that prevents freezer burn, and a small set of rules that keep taste bright. This guide gives you that system—so your future self gets a smoothie, not a chore.

Why Smoothie Meal Prep Fails (And How to Avoid the Traps)
Meal prep fails for three predictable reasons: the pack freezes into one solid mass, the flavor goes flat, or the blend turns watery and foamy. None of those problems are mysterious. They come from how water behaves in a freezer, how oxygen affects fruit, and how thick mixtures circulate inside a blender.
When ingredients freeze together in a tight block, your blender can’t build a vortex. Instead of pulling pieces down, the blades spin in a hollow pocket and the frozen mass sits above. The fix is not “more power.” It’s pack design. If your blender tends to stall on frozen mixes, this technique article is worth keeping bookmarked: Frozen Fruit Smoothie Technique.
The second trap is oxidation. A freezer slows chemical reactions, but it doesn’t stop them. Fruit aromas and delicate flavors fade when chopped ingredients sit exposed to air. And greens pick up “freezer smell” faster than people expect. Smart storage isn’t about perfection—it’s about minimizing air and moisture migration.
The Two Freezer-Pack Styles (Choose One on Purpose)
Smoothie prep is easier when you pick a style and stick to it. Most people mix styles by accident and get inconsistent results.
Style A: Ingredient packs (liquid added fresh)
This is the classic: you freeze solid ingredients together and add liquid the day you blend. It’s the most flexible because you can adjust thickness, swap liquids, and change calories without rebuilding packs.
Style B: Pre-blended cubes (smoothie “ice cubes”)
You blend a batch once, pour it into molds, freeze, and then re-blend cubes with a splash of liquid. This can be faster and can reduce circulation problems, but it takes freezer space and requires one bigger prep session up front.
For most kitchens, Style A is the best default. It’s simple, it scales, and it doesn’t demand special containers. The rest of this guide focuses on Style A, with notes on Style B where it matters.
Portioning That Blends: Your “Base Formula”
You don’t need a strict recipe. You need repeatable ratios that match your blender and your preferred texture. Here’s the practical structure that works for most smoothie packs:
Frozen fruit (main body): enough to make the smoothie cold and thick, but
not so much that it becomes a solid brick.
Greens or fiber add-ins (optional): included in a way that doesn’t dominate
circulation.
Flavor boosters (small): citrus, ginger, cocoa, spices—powerful, but easy
to overdo.
“Fresh adds” (not frozen): liquids, yogurt, protein powder, nut
butter—added at blend time for better texture.
The most important decision is what you freeze and what you keep fresh. Freezing everything is convenient, but it’s not always the best for taste and texture. For example, many protein powders taste and feel better when added fresh and allowed to hydrate briefly. If gritty protein smoothies are your problem, use this: Protein Smoothies That Don’t Get Gritty.
How to Build Packs That Don’t Freeze Into a Rock
Frozen “bricks” happen because wet ingredients stick together and freeze as one unit. Your goal is separation. That doesn’t mean individual pieces must remain perfectly separate—but you want enough loose structure that liquid can flow between ingredients when blending begins.
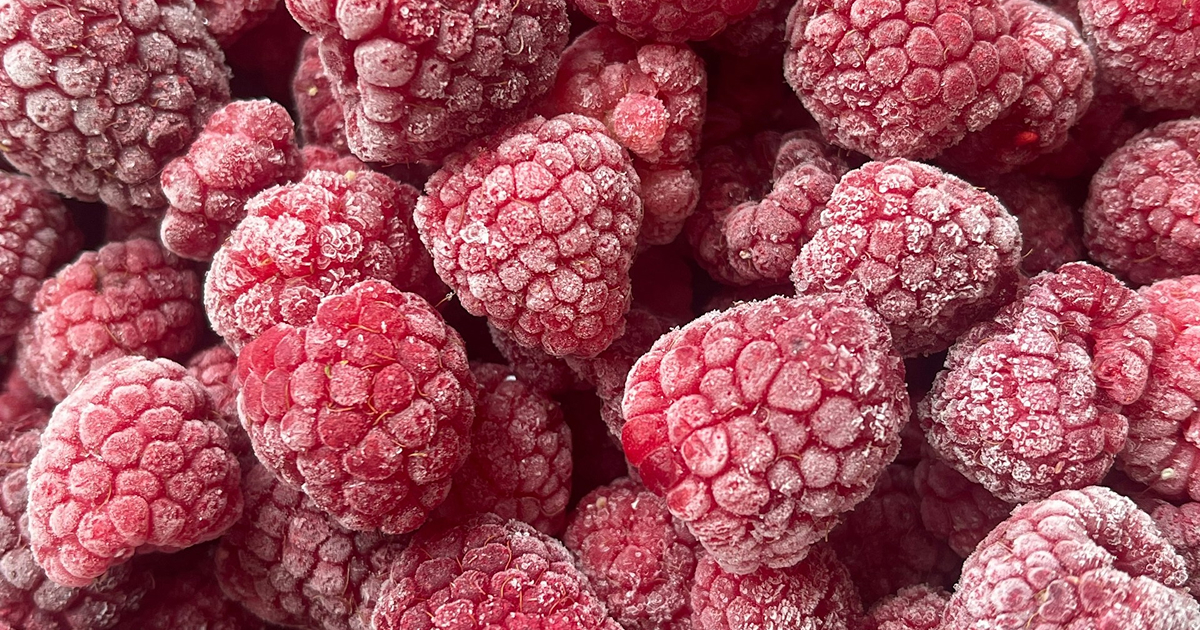
Use dry-frozen pieces when possible
Individually frozen fruit (like store-bought frozen berries) is naturally pack-friendly because pieces are already separated. Fresh fruit you freeze at home often clumps because surfaces are wet. If you’re freezing fresh fruit, spread pieces on a tray first, freeze them until firm, then bag them. That single step prevents most “solid mass” issues.
Keep sticky ingredients out of the freezer pack
Nut butter, honey, thick yogurt, dates, and similar sticky items bind the pack into a solid chunk. They also smear on bag walls, making cleanup annoying. Add these fresh at blend time. You’ll get better texture and fewer blending stalls.
Don’t compress the bag
People pack bags like they’re vacuum sealing. Compression removes air gaps and increases clumping. Instead, aim for a flatter, looser pack: squeeze out excess air (yes), but don’t mash ingredients into a single dense slab.
Storage That Preserves Flavor: Air, Moisture, and Time
Freezer burn is not “old food.” It’s dehydration: moisture migrates out of exposed surfaces, leaving tough, bland spots. Odor transfer is the same story—volatile aromas migrate between foods in a shared freezer space.
The fix is minimizing air exposure and keeping temperature stable. That means good sealing and smart placement: deep freezer zones are more stable than door shelves, which warm up every time you open the freezer.
Practical rule: keep smoothie packs away from the freezer door if you care about taste. Door storage is convenience-first, flavor-last.
Bags vs containers
Bags win on space efficiency. Containers win on protection (less crushing, less puncture risk). If you use bags, consider placing them in a larger, rigid bin so they stack neatly and don’t get ripped by sharp frozen edges or other items.
If you use containers, keep them shallow rather than tall. Tall containers can freeze into thick blocks that are harder to break apart and slower to blend.
Labeling That Actually Helps Future-You
Most labels are useless: “Berry” tells you nothing. Your label should answer two questions at 7:00 AM: what liquid should I add, and how thick will this be?
A simple label format that works: Flavor + Date + Suggested Liquid. Example: “Mango Greens — Dec 30 — add 1 cup water/almond milk.” That’s enough to keep your routine smooth.
Blending From Frozen Without Fighting Your Blender
Freezer packs change blending dynamics. The first 10 seconds matter most because that’s when circulation either starts or fails. You want liquid to reach the blade zone immediately and create a “pull-down” path.
Load order still matters
Add liquid first, then the freezer pack, then any powders or soft add-ins last. This reduces air pockets under the blades and encourages the pack to drop into the cutting zone. If you want the full “why” behind this, it’s covered here: How to Make Smoothies in Any Blender.
Use a short “wake-up” phase
Don’t slam into max speed immediately. Start low for a few seconds to let liquid seep into gaps, then increase speed. Thick mixtures often blend smoother when you build the vortex gradually rather than trying to brute-force it.
If it stalls, don’t keep running it
The worst habit is letting a blender spin against a stalled mass for 30–60 seconds. That heats the motor and can wear seals. Instead, stop, add a small splash of liquid, and restart. You’re not “ruining the smoothie.” You’re restoring circulation.
How Long Do Freezer Packs Last?
There’s “safe,” and there’s “still tastes good.” Most smoothie ingredients remain safe frozen for a long time, but flavor and texture quality can decline faster than people expect—especially for delicate berries and leafy greens.
For quality, a realistic target is rotating packs within several weeks rather than letting them sit indefinitely. If you meal prep weekly, you’ll naturally rotate through without thinking about it.
Greens are the quickest to pick up freezer odor and lose brightness. If you prep far in advance, consider freezing fruit-only packs and adding fresh greens at blend time. That’s a small daily step that can dramatically improve flavor.
“Prep Day” Workflow: Make It Fast, Not Perfect
The biggest meal prep mistake is overcomplicating it. Your prep day should feel like assembly, not cooking. A clean approach looks like this:
- Stage ingredients: put bags/containers on the counter first so you’re filling, not searching.
- Batch by flavor: build 3–4 of one flavor, then switch. It reduces decision fatigue.
- Freeze flat: lay bags flat until solid so they stack well and blend more predictably.
- Clean immediately: sticky fruit juices attract chaos. Quick wash keeps prep day short.
If cleanup is your bottleneck, treat it like part of the system. A blender that smells or feels annoying to wash will sabotage meal prep because you’ll procrastinate the whole routine. This cleaning guide is built for that reality: Cleaning a Blender Fast (Without Funk).
Three Freezer-Pack Templates That Cover Most People
You don’t need dozens of recipes. You need a few templates you can rotate and customize. Keep the structure stable and change the flavor notes.
1) Bright Berry: mixed berries + banana (optional) + pinch of citrus zest. Add liquid fresh; add yogurt fresh if you want creaminess.
2) Tropical Green: mango/pineapple + a small portion of greens. Keep sticky add-ins (nut butter) for blend time.
3) Cocoa Comfort: frozen banana + a small amount of berries or cherries for depth. Add cocoa and protein powder fresh for smoother texture.
Use these as patterns, not rules. The goal is a freezer that supports your routine, not a freezer full of “projects” you never use.
Smoothie meal prep succeeds when it reduces friction. Build packs that stay loose, store them in a stable freezer zone, label them for quick decisions, and blend with a method that prioritizes circulation. Do that, and “grab and blend” becomes true—without sacrificing taste or burning out your blender.
