Frozen Fruit Smoothie Technique: Preventing Stalls Without Adding Too Much Liquid
Frozen fruit is the best thickener and the most common reason smoothies stall. It clumps, bridges, and turns your blender into a loud fan that spins under a frozen dome. The typical “fix” is to add more liquid—until the smoothie moves… and tastes diluted. This guide is the opposite approach: a technique that makes frozen fruit blend smoothly with minimal liquid, using loading order, staged speeds, and a few small habits that prevent frozen blocks from forming in the first place.


Why Frozen Fruit Stalls a Blender (The Physics, Not the Drama)
A blender doesn’t “blend” the whole jar at once. It blends what enters the blade zone. For a smoothie to become smooth, ingredients must circulate: down into the blades, then back up, repeating until particles are small enough to disappear into the liquid.
Frozen fruit interrupts this in three predictable ways:
- Clumping: frozen pieces stick together (especially mango, strawberries, pineapple).
- Bridging: clumps form a “cap” above the blades, so the blades tunnel underneath.
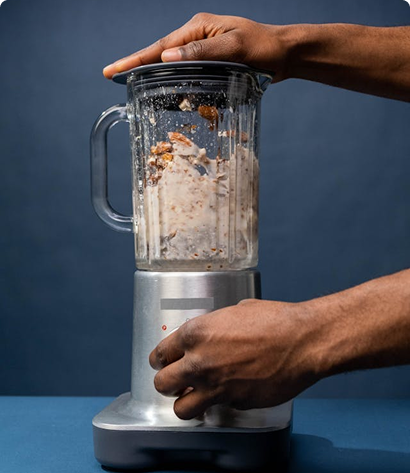
- Too-dry loading: thick ingredients at the bottom + frozen on top creates a jar with no free liquid at the blades.
The goal of this technique is simple: establish circulation first, then let frozen fruit feed into that circulation gradually. If you do that, you don’t need to water anything down.
The Minimal-Liquid Frozen Fruit Formula
There’s no universal “perfect ratio” because blender designs vary. But there is a reliable starting point for thick frozen-fruit smoothies:
- Liquid: 1/2 to 3/4 cup
- Frozen fruit: 2 cups
- Soft base (optional but helpful): 1/2 banana or 1/3–1/2 cup yogurt
If your blender is modest or your frozen fruit is especially clumpy, start closer to 3/4 cup liquid. If your blender is strong (or you use a tamper), you can often hold at 1/2 cup.
For broader guidance on smoothie ratios and ingredient order beyond frozen fruit, use the fundamentals guide here: How to Make Smoothies in Any Blender.
Loading Order That Prevents Frozen “Bridges”
Frozen fruit stalls are often created before the blender even starts. Loading order determines whether the blades get immediate liquid contact and whether frozen pieces can fall into circulation.
Use this order for frozen-heavy smoothies:
- Liquids first. Always. This is your circulation starter.
- Sticky/soft ingredients. Yogurt, nut butter, honey, dates (anything that can trap air pockets).
- Fresh fruit or half a banana. Helps create a workable base without extra water.
- Frozen fruit last. Heavy ingredients belong on top so they fall into the moving center.
A common mistake is “frozen first so it hits the blades.” That sounds logical, but it creates a blockage: frozen pieces sit against the blades, lock together, and prevent the first circulation from starting. Liquids first is not a preference—it's the mechanism.
The Staged-Speed Method: Pulse, Catch, Finish
Going straight to high speed is how you create tunnels. High speed can carve a cavity beneath a frozen dome, leaving the top unmoved forever. You want the opposite: controlled collapse.
Stage 1: Pulse to break clumps (5–10 seconds total)
- Pulse 2–4 times (short bursts).
- Listen for the sound: it should shift from “hard rattling” to a more consistent churn.
- If nothing changes, stop and redistribute before you keep forcing it.
Stage 2: “Catch” the circulation (10–20 seconds)
Blend on low-to-medium. You’re trying to create a stable center flow where frozen fruit starts to feed down naturally. This is the stage most people skip. It’s also the stage that prevents the stall.
Stage 3: Finish on higher speed (20–45 seconds)
Once you see movement—top sinking, surface pulling down, fewer “dead spots”—then go higher to polish the texture. Stop as soon as it’s smooth. Overblending warms the mixture and makes it thinner.
The “Stop Rule” That Saves Thickness
If your blender stalls, most people react with liquid. That’s how thick smoothies become thin. Instead, use this rule:
If the jar isn’t circulating by ~15 seconds, stop and fix structure—don’t add liquid yet.
The fix is usually mechanical, not ingredient-based:
- Redistribute: scrape sides, collapse the top dome toward the center.
- Break the bridge: if your blender uses a tamper, use it properly (keep it moving, don’t pin ingredients).
- Reduce load: remove 10–20% into a bowl, blend what’s left smooth, then add back gradually.
If “chunky smoothies” are a recurring issue for you, the bigger troubleshooting checklist is here: Why Smoothies Turn Chunky (and How to Fix It).
How to Use Less Liquid Without Turning Your Blender Into a Gym
“Less liquid” is not a badge of honor. It’s a controlled choice. The goal is thickness, not suffering. Here are the clean ways to keep a smoothie thick without stalling the blender.
Use a “soft base” instead of extra water
When a smoothie is too thick to circulate, you can fix it with water—or you can fix it with ingredients that add body without dilution.
- Banana: half a banana changes circulation dramatically and thickens the result.
- Yogurt/kefir: improves mouthfeel; often needs a splash of water to start moving, but far less than pure liquid.
- Silken tofu (if you use it): neutral, creamy, blends smoothly.
Keep frozen pieces small (especially the “bridge fruits”)
Not all frozen fruit behaves the same. Small berries tend to roll and feed downward. Mango and strawberry chunks love to weld into bricks. If your frozen mix includes big pieces, do this before loading:
- Bang the bag on the counter to separate pieces.
- Break oversized chunks by hand (or with a quick rinse and re-freeze as separated pieces if you’re meal-prepping).
- Let a clumped bag sit for 2–3 minutes so the surface frost loosens.
You’re not “thawing” it into mush. You’re preventing a solid block from entering the jar.
Don’t stack frozen fruit like concrete
If you pack frozen fruit tightly, you remove the air gaps that allow pieces to shift and collapse. This is why a “tight-packed” personal blender cup stalls more than a loosely filled jar.
Practical move: pour frozen fruit in, then gently shake/tap the jar once to settle it—don’t press it down.
Frozen Fruit + Ice: The Silent Texture Saboteur
Adding ice to frozen fruit is common, but it changes the blending problem. Ice is harder than most frozen fruit and doesn’t contribute flavor. It also increases the chance of “slush with rocks” if your blender can’t fully crush it.
- If you want thicker, prefer more frozen fruit (or frozen banana) over more ice.
- If you want colder without dilution, chill the liquid first instead of adding ice.
- If you use ice, keep it small (crushed ice is easier than cubes in many blenders).
If you’re regularly debating ice vs no ice, the dedicated guide can help you choose based on texture goals (and blender limitations): Ice in Smoothies: When to Use It.
Blender-Type Adjustments (So the Same Recipe Works Everywhere)
Single-serve / personal blenders
Narrow cups exaggerate bridging. Use slightly more liquid than you think you need and rely on pulses. Also avoid oversized frozen chunks—this is where personal blenders lose most battles.
- Start with 3/4 cup liquid for 2 cups frozen fruit.
- Pulse first, then blend low-to-medium before finishing.
- If it stalls, remove a portion and blend in two passes (it’s faster than fighting the cup).
Budget countertop blenders
These can make excellent frozen smoothies if you respect their limits. The two most important habits: don’t overfill and don’t start on max speed.
- Use the staged-speed method (pulse → medium → finish).
- Prioritize smaller frozen pieces and a soft base (banana/yogurt) instead of a mountain of ice.
- Stop once to redistribute rather than repeatedly adding liquid.
High-performance blenders
Strong blenders allow thicker loads, but they also heat smoothies faster. The biggest “why is it watery?” moment in premium machines is simply overblending. Once smooth, stop.
- Use less ice; rely on frozen fruit for thickness.
- Shorten the final high-speed stage.
- Use a tamper correctly (move it; don’t lock ingredients in place).
The 30-Second Emergency Fix When It Stalls Mid-Blend
If your blender stalls mid-blend, your goal is to restore circulation without adding a cup of liquid. Do this:
- Stop. Don’t “power through” a dead jar.
- Scrape + collapse. Pull stuck ingredients off the walls and push the top dome into the center.
- Pulse 2–3 times. Short pulses break the bridge without recreating it instantly.
- Blend on low-to-medium. Catch circulation again.
- Only if still dead: add 1–2 tablespoons liquid and repeat.
If you find yourself needing more than a few tablespoons, the real cause is usually volume (too much in the jar) or frozen fruit loaded as a clump. Fix that pattern next time and the “emergency” stops happening.
Meal-Prep Reality: Why Freezer Packs Sometimes Blend Worse
Freezer packs are convenient, but they can create one giant frozen puck if you pack them tight, compress air out, or let them partially thaw and refreeze. That puck is a stall factory.
Make freezer packs blend-friendly:
- Freeze flat, not in a ball. A thin sheet breaks easily.
- Keep large pieces out. Slice bananas; avoid whole strawberries.
- Store “wet add-ins” separately. Yogurt/nut butter added fresh helps circulation start.
- Loosen before blending. Tap the pack to break pieces, or let it sit 2–3 minutes.
The honest takeaway: thick frozen smoothies are mostly technique, not equipment. When you load liquids first, keep frozen pieces separated, start with pulses, and “catch” circulation before finishing, you stop needing the one thing that ruins the result: extra liquid.